


Introduction to the Classic Cheese Ball Recipe
If you’re looking for a show-stopping appetizer, this cheese ball recipe with dried beef is the perfect choice. Creamy, flavorful, and incredibly easy to make, it’s a crowd-pleaser that works for any occasion. Whether it’s a holiday party, game night, or family gathering, this appetizer is guaranteed to be the star of the snack table.
What makes this recipe unique is the use of dried beef. Its savory, salty flavor pairs perfectly with the smooth cream cheese base, creating a balance of flavors that’s absolutely irresistible.
In this guide, you’ll learn how to make the ultimate cheese ball recipe with dried beef with dried beef, discover tips for perfecting the texture, and explore creative variations to suit your taste. Ready to wow your guests with this classic dish? Let’s dive into the details!
Ingredients for the Perfect cheese ball recipe with dried beef
A great cheese ball recipe with dried beef starts with the right ingredients. Each component adds its unique touch to the flavor and texture, making the final dish both irresistible and easy to prepare. Here’s everything you’ll need to create the ultimate cheese ball with dried beef.
Core Ingredients: Dried Beef, Cheese, and More
- Cream Cheese (8 oz): The creamy base that holds everything together. Use full-fat cream cheese for the best texture and flavor.
- Dried Beef (4 oz): Chopped dried beef adds a salty, savory note. You can find this in small jars or packets at your grocery store.
- Shredded Cheddar Cheese (1 cup): For a sharp, cheesy flavor that enhances the richness of the dish.
- Green Onions (¼ cup): Finely chopped green onions provide a subtle, fresh tang that cuts through the creaminess.
- Garlic Powder (½ tsp): A simple seasoning that adds depth without overpowering the dish.
Optional Add-Ins for Flavor and Texture
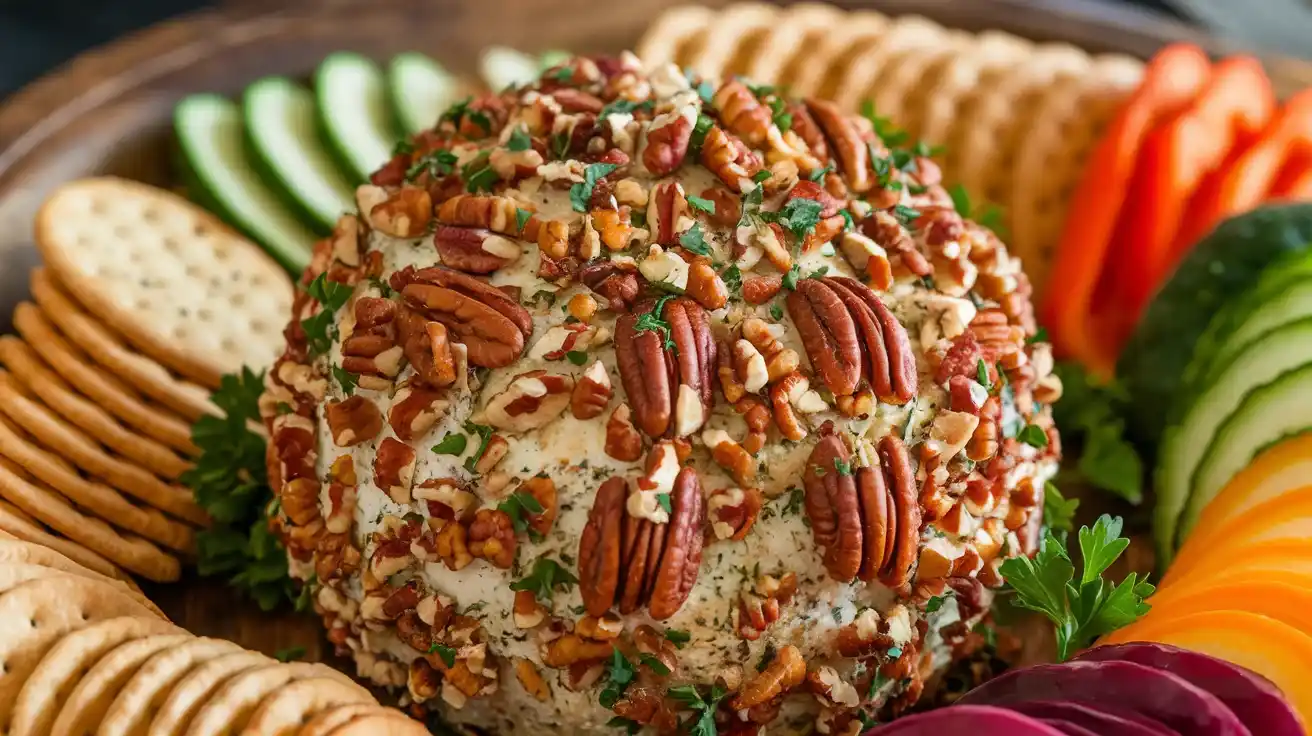
- Crushed Pecans (½ cup): Add a nutty crunch to the exterior coating of the cheese ball.
- Chopped Parsley (2 tbsp): A fresh garnish for color and flavor.
- Spices (Paprika or Cayenne): For those who like a hint of heat in their appetizers.
Choosing the Best Dried Beef for the Recipe
Not all dried beef is created equal. Look for brands like Buddig or Armour, known for their quality and consistency. If you can’t find dried beef, corned beef or thinly sliced beef deli meat can serve as substitutes, though the flavor will differ slightly.
With these ingredients in hand, you’re ready to start mixing and shaping your cheese ball. In the next section, we’ll guide you step-by-step through the preparation process.
Step-by-Step Preparation Process
Making a cheese ball recipe with dried beef with dried beef is as simple as mix, shape, coat, and chill. Follow these steps to create a perfectly creamy, flavorful appetizer that will have your guests asking for seconds.
Step 1: Mixing the Base Ingredients
- Soften the Cream Cheese: Leave the cream cheese at room temperature for about 15–20 minutes. This ensures it’s soft enough to blend easily with the other ingredients.
- Combine the Ingredients: In a mixing bowl, add the softened cream cheese, shredded cheddar, and garlic powder. Use a sturdy spoon or a hand mixer to combine everything until smooth.
- Add the Dried Beef and Green Onions: Finely chop the dried beef and green onions, then fold them into the cream cheese mixture. Make sure the ingredients are evenly distributed.
Step 2: Shaping the Cheese Ball
- Form the Mixture into a Ball: Transfer the mixture onto a sheet of plastic wrap. Use the wrap to mold the mixture into a round ball.
- Secure the Shape: Twist the ends of the plastic wrap tightly to hold the shape. Refrigerate the cheese ball for at least one hour, or until firm.
Step 3: Coating the Cheese Ball
- Prepare Your Coating: In a shallow dish, mix your chosen coating ingredients, such as crushed pecans, chopped parsley, or even shredded cheese.
- Roll the Cheese Ball: Unwrap the chilled cheese ball and gently roll it in the coating mixture until fully covered. Press lightly to ensure the coating sticks.
Optional Variations
- Dual Coatings: Split your cheese ball into two smaller balls and coat them with different toppings, like pecans for one and parsley for the other.
- Shaped Cheese Ball: For festive occasions, use cookie cutters to create themed shapes (like a Christmas tree or a football).
Final Touches
Place the coated cheese ball recipe with dried beef on a serving plate. Add crackers, sliced vegetables, or breadsticks around it for a complete appetizer platter.
With these easy steps, you’ll have a cheese ball that’s not only delicious but also looks professionally made. Next, we’ll explore tips to ensure the perfect texture and flavor.
Tips and Tricks for the Perfect Cheese Ball Texture
Creating a cheese ball with the ideal texture can make all the difference between a snack that’s just okay and one that’s unforgettable. Here are some essential tips and tricks to achieve a creamy, easy-to-spread cheese ball recipe with dried beef every time.
How to Prevent Your Cheese Ball from Getting Hard
- Use Fresh Ingredients: Always use fresh cream cheese and shredded cheese. Older cheese may lead to a firmer, less creamy texture.
- Avoid Over-Chilling: While it’s important to refrigerate the cheese ball, leaving it in the fridge for too long can make it overly hard. For best results, let it sit at room temperature for 15 minutes before serving.
- Watch the Add-Ins: Overloading your cheese ball with too many solid add-ins like nuts or bacon can cause the overall texture to become dense and difficult to spread.
Thickening a Too-Soft Cheese Ball
- Chill Longer: If your cheese ball is too soft to hold its shape, let it chill in the refrigerator for an additional hour or two.
- Add Thickeners: If the mixture remains too runny, mix in extra shredded cheese or finely crushed crackers to thicken it up.
- Balance the Wet Ingredients: Avoid using watery add-ins like fresh tomatoes or overly juicy vegetables, as these can thin the mixture.
Achieving the Perfect Balance of Flavors
- Season Gradually: Start with smaller amounts of garlic powder, green onions, or other spices, and adjust to taste. You can always add more, but you can’t take it out.
- Mix Thoroughly: Ensure all ingredients are evenly distributed to avoid bites that are too salty, cheesy, or bland.
- Experiment with Coatings: The coating adds an extra layer of flavor and texture. Crushed pretzels, everything bagel seasoning, or even finely chopped dried cranberries can be great alternatives to the traditional nut coating.
By keeping these tips in mind, your cheese ball recipe with dried beef will have a luscious, spreadable texture that guests won’t be able to resist.
Creative Variations of the Cheese Ball Recipe
While the classic cheese ball recipe with dried beef is a fan favorite, there are endless ways to customize this appetizer to suit different tastes and occasions. Here are some creative variations that will take your cheese ball game to the next level.
Cheese Ball with Bacon and Chives
- Ingredients: Add crispy, crumbled bacon and fresh chives to the cream cheese mixture.
- Coating: Roll the cheese ball in a combination of crumbled bacon and chopped parsley for a savory and aromatic finish.
- Why It’s a Hit: Bacon adds a smoky, salty kick, while the chives provide a fresh contrast.
Spicy Jalapeño Cheese Ball
- Ingredients: Incorporate finely chopped fresh jalapeños or pickled jalapeños for some heat. A dash of cayenne pepper can enhance the spice.
- Coating: Use a mix of crushed tortilla chips and chili flakes for a bold, spicy exterior.
- Why It’s a Hit: This variation is perfect for guests who enjoy a little heat with their appetizers. Serve with tortilla chips for a Tex-Mex twist.
Vegetarian-Friendly Cheese Ball
- Ingredients: Swap out the dried beef for sun-dried tomatoes or roasted red peppers. Add fresh herbs like basil or dill.
- Coating: Roll the cheese ball in a mix of crushed nuts and fresh herbs.
- Why It’s a Hit: The vibrant flavors of the vegetables and herbs make this a lighter, vegetarian-friendly option.
Holiday-Themed Cheese Ball
- Ingredients: Add dried cranberries and a touch of honey for sweetness.
- Coating: Roll the cheese ball in crushed pistachios and dried cranberries for a festive look.
- Why It’s a Hit: This version is perfect for Christmas or Thanksgiving gatherings, adding both visual appeal and unique flavors.
These variations allow you to experiment with flavors and textures, ensuring there’s a cheese ball recipe with dried beef for every occasion.
Pairing Suggestions and Serving Tips
A cheese ball recipe with dried beef is delicious on its own, but the right pairings and presentation can elevate it into an irresistible centerpiece for your appetizer table. Here’s how to serve and pair your cheese ball with style.
What to Serve with a Cheese Ball
- Crackers:
- Classic options like Ritz or Club crackers complement the creamy texture.
- Add variety with whole-grain, seeded, or flavored crackers for an exciting crunch.
- Breadsticks and Crostini:
- Thin breadsticks or crispy crostini slices make elegant dipping choices.
- Vegetables:
- Fresh veggies like carrot sticks, celery, bell pepper slices, and cucumbers provide a crisp and healthy pairing.
- Fruits:
- Sweet fruits like apple slices, grapes, or dried apricots add a delightful contrast to the salty cheese ball.
Presentation Tips for an Elegant Spread
- Platter Arrangement:
- Place the cheese ball in the center of a large serving platter, surrounded by crackers, veggies, and breadsticks arranged in a circular pattern.
- Garnish Creatively:
- Add fresh parsley, rosemary sprigs, or edible flowers for a pop of color.
- Cheese Knife or Spreader:
- Provide a small knife or spreader for guests to easily serve themselves.
Best Storage Practices for Leftovers
- Wrap Tightly:
- Cover any leftover cheese ball with plastic wrap or transfer it to an airtight container.
- Refrigeration:
- Store in the refrigerator for up to 5 days. Let it sit at room temperature for 15 minutes before serving again.
- Freezing Option:
- Cheese balls can be frozen for up to 1 month. Thaw in the refrigerator overnight before serving.
Addressing Common Cheese Ball Issues (FAQ)
Why is My Cheese Ball Too Hard?
Over-Chilling:
Cheese balls become firm when refrigerated for too long.
Fix: Let it sit at room temperature for 15–20 minutes before serving to soften.
Too Many Dry Ingredients:
Excessive dried beef, shredded cheese, or nuts can make the mixture overly stiff.
Fix: Add 1–2 tablespoons of softened cream cheese to restore a creamy consistency.
How to Fix Clumpy Cheese That Won’t Melt
Temperature Issues:
Cheese that’s too cold may clump instead of blending smoothly.
Fix: Always use room-temperature ingredients when mixing.
Overmixing:
Overworking shredded cheese can cause it to clump.
Fix: Mix ingredients gently and only until combined.
How to Thicken a Cheese Ball That’s Too Soft
Refrigeration:
A soft cheese ball often needs more time to chill.
Fix: Wrap it tightly in plastic wrap and refrigerate for 1–2 hours.
Add Thickeners:
Incorporate shredded cheese, finely crushed crackers, or a sprinkle of breadcrumbs into the mixture.
Storing and Reusing Cheese Balls Effectively
Refrigeration Duration:
A homemade cheese ball can last 4–5 days in the refrigerator if stored in an airtight container.
Tip: Always serve it fresh for the best taste and texture.
Freezing Cheese Balls:
Cheese balls freeze well for up to 1 month.
Reheating Tip: Thaw the cheese ball in the refrigerator overnight and reshape it if needed.
How to Avoid Flavors Overpowering the Cheese Ball
Balance Ingredients:
Too much garlic or dried beef can overwhelm other flavors.
Fix: Start with small quantities of strong flavors and adjust as needed.
Mix Evenly:
Uneven distribution of ingredients can cause overpowering bites.
Fix: Mix thoroughly to achieve a balanced taste.
Nutritional Information and Health Tips
Cheese balls are undeniably delicious, but knowing their nutritional value can help you enjoy this indulgent appetizer responsibly. With a few tweaks, you can also make it a healthier option for your guests.
Calories and Macros in a Cheese Ball
A typical cheese ball recipe with dried beef made with cream cheese, dried beef, and shredded cheddar provides approximately:
- Calories per serving (2 tbsp): 150–200
- Macronutrients:
- Protein: 6–8 grams (from cheese and dried beef)
- Fat: 12–14 grams (mainly from cream cheese and cheddar)
- Carbohydrates: 1–2 grams
While the high protein and low carb content make cheese balls suitable for low-carb or keto diets, the fat content can be significant. Moderation is key!
Making a Lighter Version of the Cheese Ball
- Low-Fat Cream Cheese:
- Substitute full-fat cream cheese with a low-fat version to reduce calories and fat.
- Skip the Heavy Coatings:
- Use herbs like parsley or chives as a coating instead of pecans or breadcrumbs to keep it light.
- Reduce Add-Ins:
- Limit the amount of shredded cheese or dried beef to make the recipe less calorie-dense.
Tips for Including It in a Balanced Diet
- Portion Control:
- Serve smaller scoops or slices of the cheese ball with lots of fresh veggies for a satisfying and guilt-free snack.
- Pair with Healthy Sides:
- Swap crackers for cucumber slices, celery sticks, or whole-grain bread to add fiber and nutrients to the dish.
- Be Mindful of Salt:
- Dried beef and cheese are naturally salty, so avoid adding extra salt to the mixture.
Fun Facts and History of the Cheese Ball
Cheese balls may seem like a modern party staple, but they’ve been delighting guests for decades. Their rich history and quirky trivia make them even more enjoyable to serve and savor.
Origins of the Cheese Ball
The cheese ball as we know it today gained popularity in the mid-20th century. However, the concept of combining cheese and other ingredients dates back centuries. Early versions were often made with goat cheese, herbs, and nuts, served in European households as a delicacy.
In the United States, cheese balls became iconic in the 1940s and 1950s. Their simplicity and ability to be made ahead of time made them perfect for entertaining during the post-war era, when hosting dinner parties was all the rage.
How It Became a Party Staple in the U.S.
The popularity of cheese balls soared in 1944, when an article in Food and Wine magazine spotlighted this versatile dish. Since then, variations have sprung up, featuring everything from sweet cranberries to spicy jalapeños.
Today, the cheese ball recipe with dried beef symbolizes comfort, creativity, and celebration. It’s a favorite during holidays, game days, and potlucks, cementing its place as a timeless appetizer.
Conclusion
A cheese ball recipe with dried beef is more than just an appetizer—it’s a surefire way to bring people together. Whether you’re hosting a casual family game night or an elegant holiday party, this versatile dish delivers on flavor, texture, and presentation.
From its creamy base to its customizable coatings, a cheese ball recipe with dried beef is the perfect canvas for culinary creativity. You can stick to the classic recipe for a timeless favorite or experiment with bold flavors like spicy jalapeños or sweet cranberries. Pair it with an assortment of crackers, veggies, or even fruits to create a platter that’s as visually appealing as it is delicious.
As you plan your next gathering, don’t hesitate to make this cheese ball recipe with dried beef the star of your appetizer spread. Its simple preparation and crowd-pleasing flavors are sure to make it a hit with guests of all ages.
Looking for more recipes to elevate your hosting game? Check out our collection of Quick and Delicious Appetizers to find the perfect companion dishes for your next event.